Post or article publishing without visual effects is not considered impressive and the post or article may not leave the good impact upon the viewers. These visual effects or the images may be still images, animated GIF or videos. The publishing of the media files upon the posts or the articles is an easy task if some steps are followed.
In the tutorial, placed below, the step by step instructions to post the images or other media files are posted.
Tutorial
1: Login to your blog or website and open up your ‘Dashboard’.
2: At the ‘Dashboard’ move the mouse upon the ‘Posts’ in the left column. This move will open up the leftward popup menu with the following options:
- All Posts
- Add New
- Categories
- Tags
3: Click the ‘Add New’. It will open up the ‘Add New Post’ interface screen.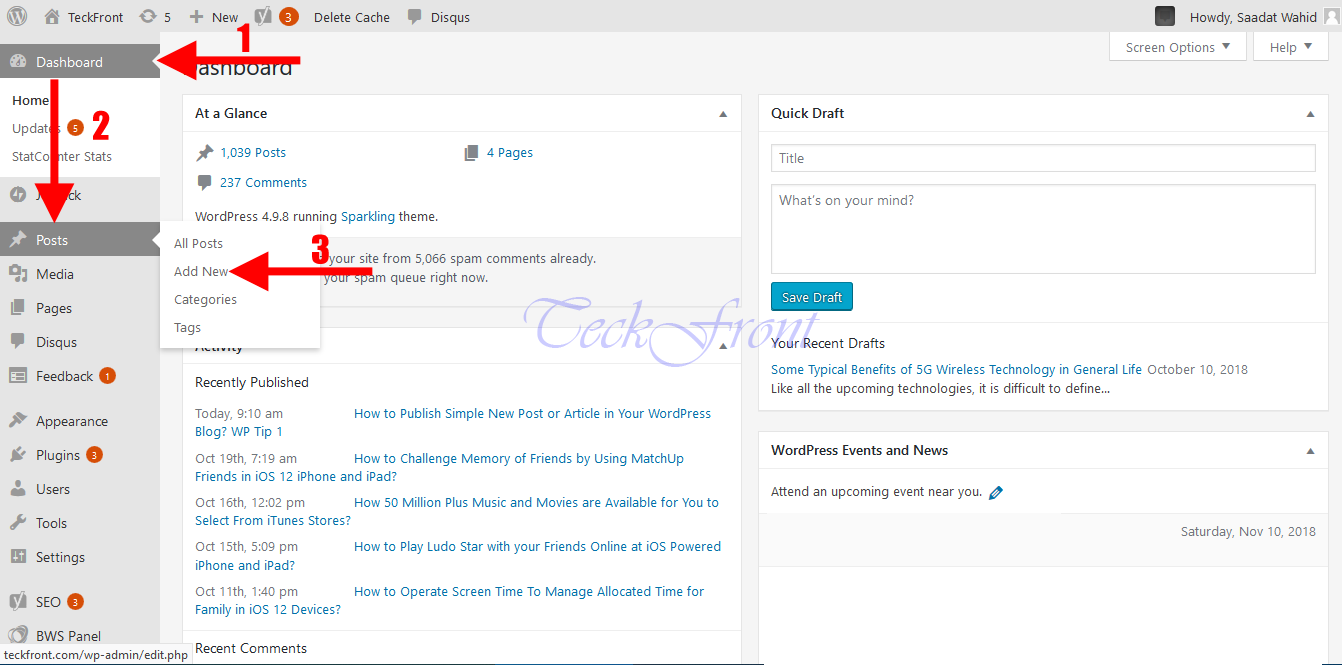
4: After writing the title of the post, click the ‘Add Media’ button. It will take you to the ‘Add Media’ interface screen.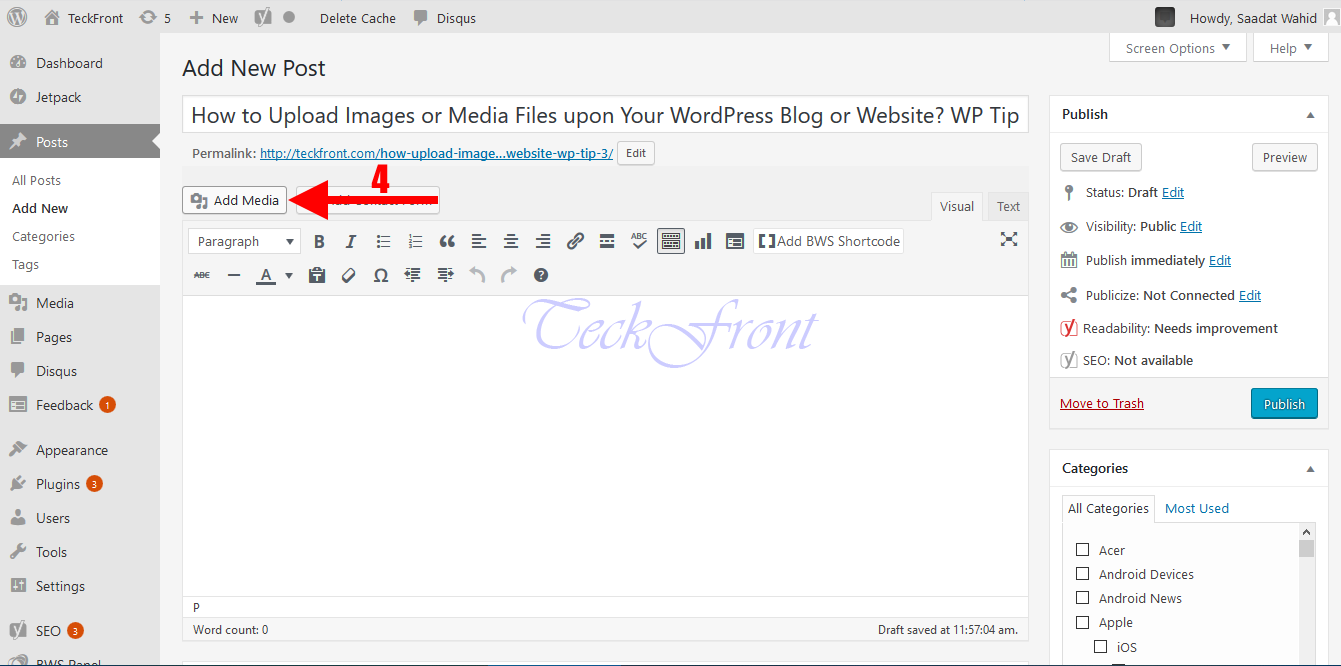
5: Here, click the ‘Select Files’ button to enter the media files, saved in your computer.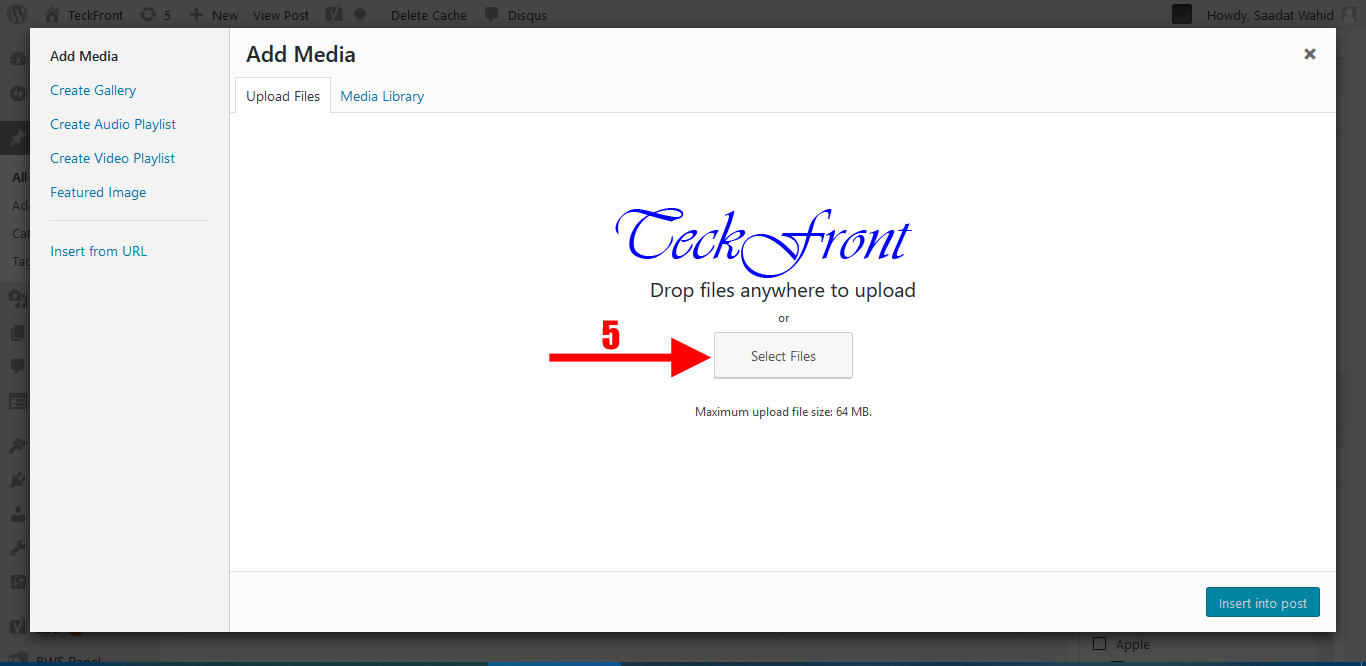
6: Select the media files from your respective folders of your computer and click them.
7: After selecting the files for insertion into the posts or articles, click ‘Open’ button. It will include and publish the media files into the media library.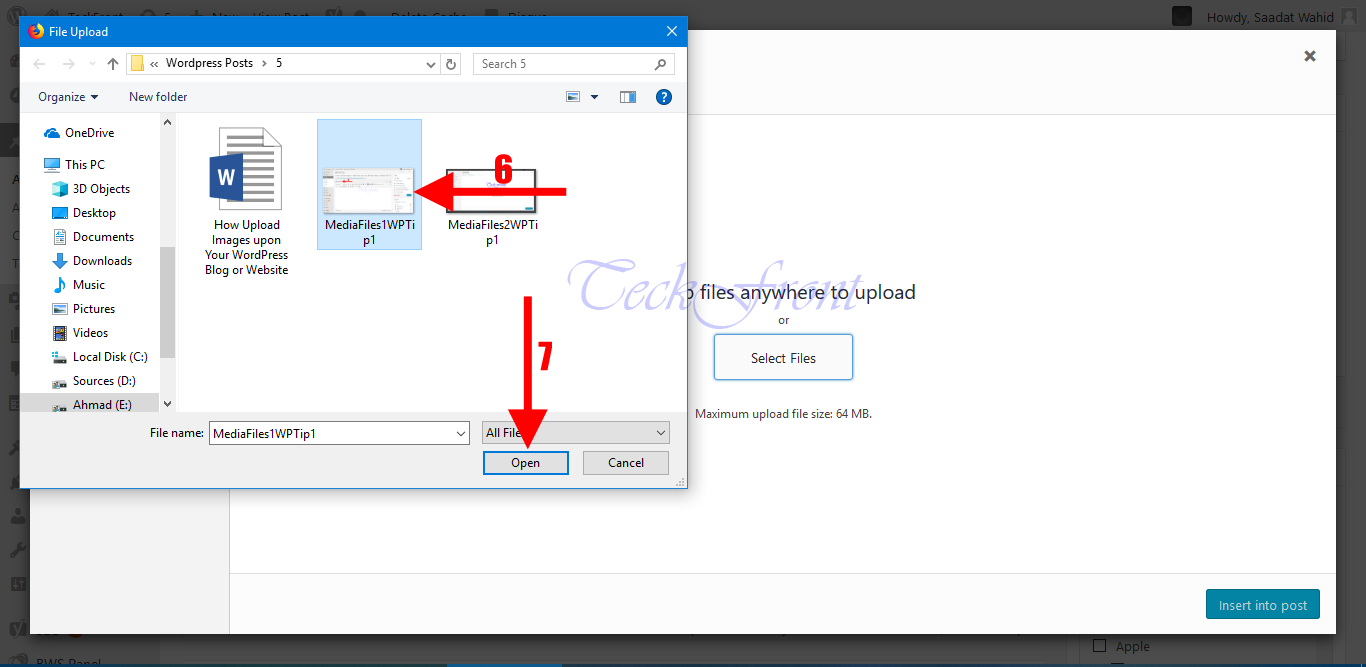
8: Select and click the file for inserting the image or media file into the post or article.
9: Now, click ‘Insert into Post’, button, place at the bottom right corner of the interface.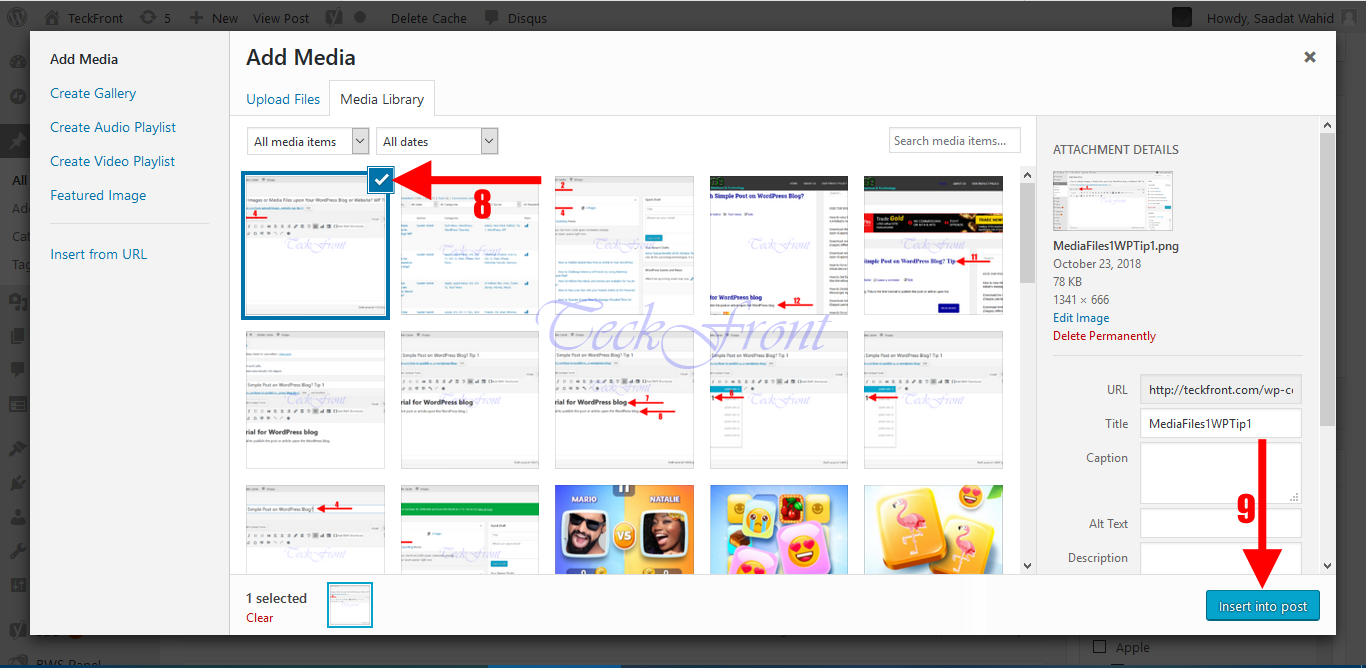
10: And see the image or the media file has been added into the post or article. So, you publish the image or the media file into the post at any time.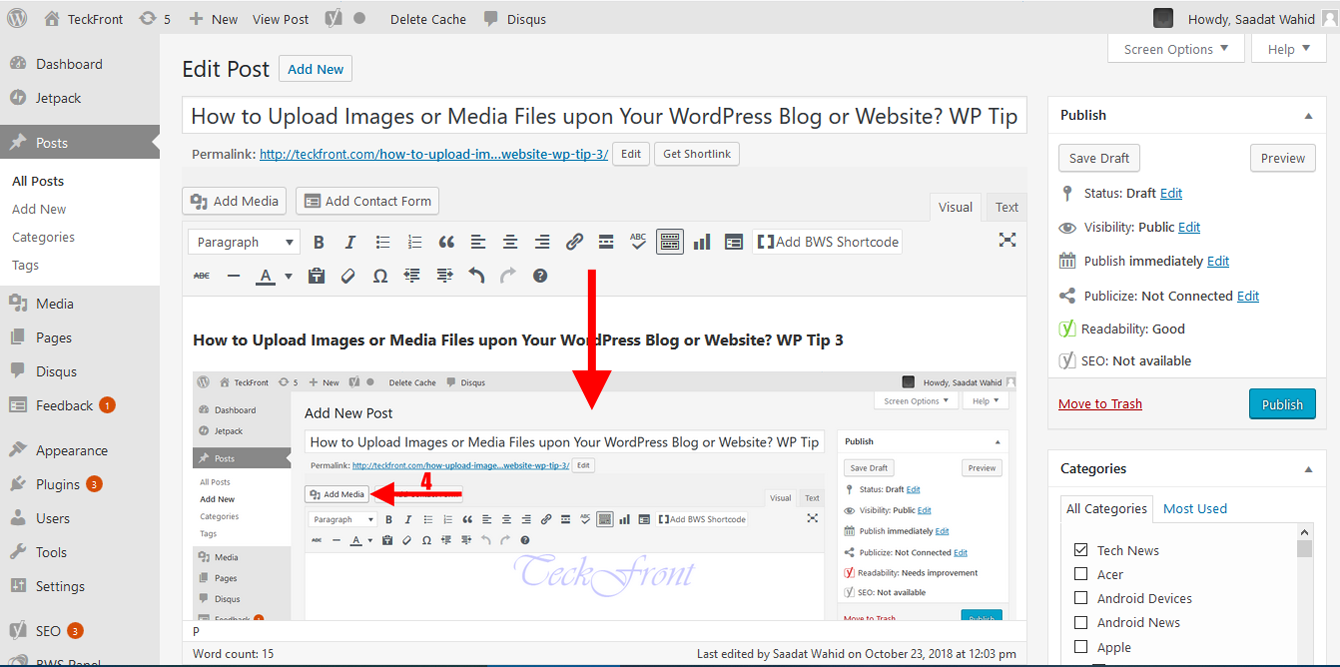
Note: You may add any image or media file into any post or article at any time even after publishing the post or article.
For the further Tips, stay tunes!